
The most basic SQL query simply grabs data from a table.
This query consists of a SELECT statement describing which columns to grab and a FROM statement describing which table to grab this data from.
You can only run one SELECT statement at a time in SQL.
If you enter some new data for the first time, as you will now, your starting point will typically be to get an understanding of which data your tables consist of.
Getting to know your data
When working with a new dataset, it’s a good idea to start by exploring the structure of your tables.
To do this:
- In the Weld editor, browse the sidebar on the left.
- Click on a table inside the
e_commerce_samplefolder. - You’ll see a list of column names — giving you an overview of the available data.
Tip: Use SELECT * to View Everything
If you want to see all columns in a table, you can use the SELECT * statement.
For example, to grab all the columns from the webshop_customer table, you can write:
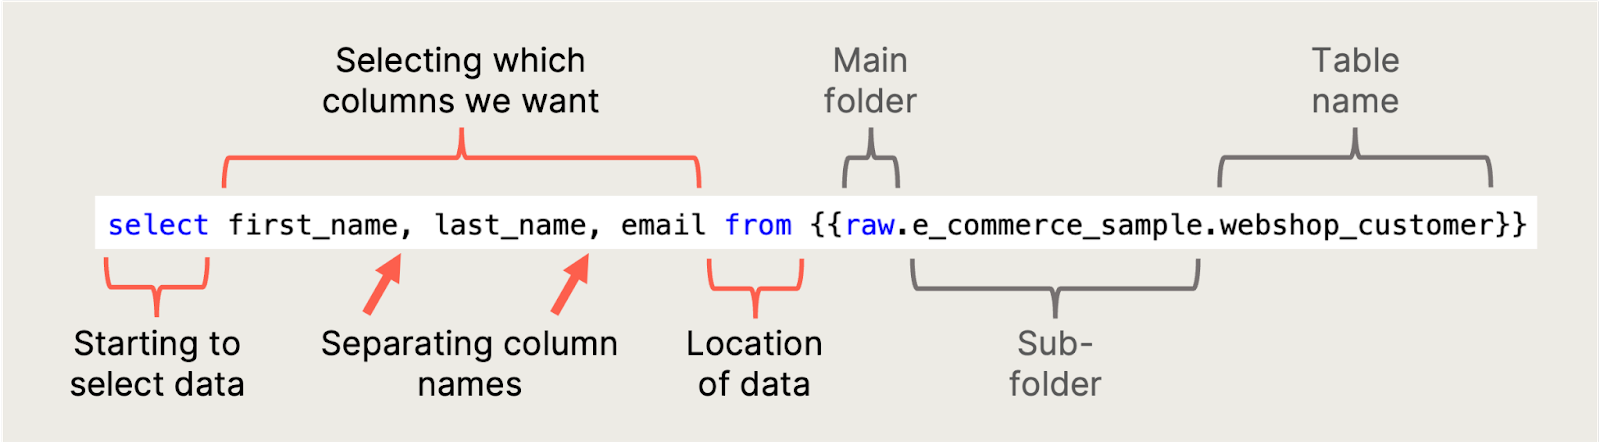
1select
2    *
3from
4    {{raw.e_commerce_sample.webshop_customer}}
Exploring Sample Data in Weld
You can try writing and running your own queries using the Weld_Sample_Data in your Weld account.
A few things to keep in mind:
- In your
FROMstatement, make sure to point to the correct destination. If you didn’t rename the Connector or Data Source when setting it up, you can copy the example query directly. - If you’re unsure about the correct path, simply browse the "Data Sources" panel in the sidebar of the Weld Editor to locate your tables.
Understanding the FROM statement
The FROM statement defines which table your query is working with.
- This means you can only reference columns that exist in the table specified after
FROM. You can’t reference data from another table unless it’s explicitly included in your query (e.g., via joins).
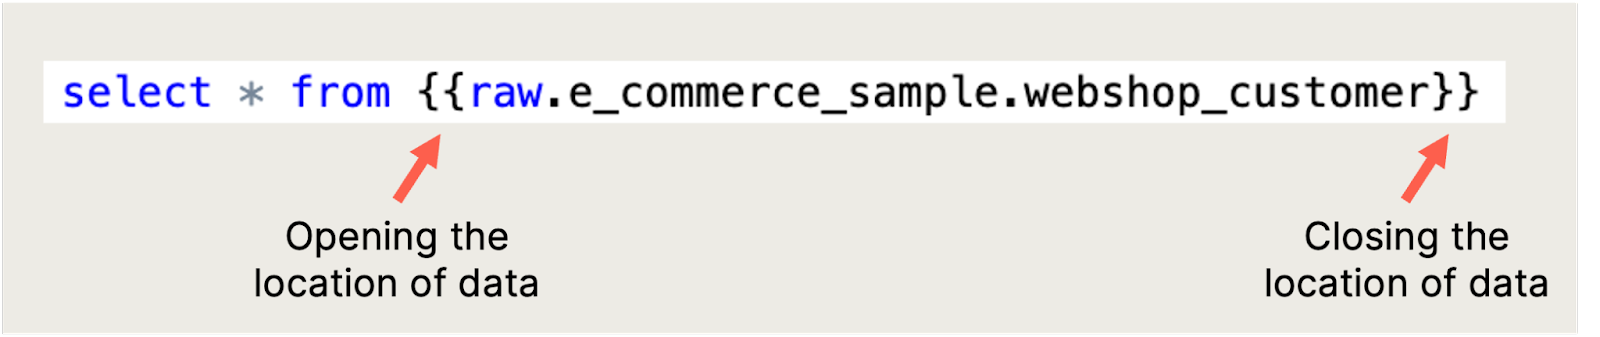
💡 Pro Tip: Use {{ }} for Lineage
To enable the lineage feature in Weld, you must always encapsulate the destination in the FROM statement in {{ and }}.
This is not strictly required, but recommended to get the data observability features in Weld.
The * will always return all data in a given table.
Your future work of analyzing or following up on data will entail a lot of data exploration.
The SELECT * query is therefore super helpful to quickly see what data is in which tables.
You can start by exploring the three tables in the sample e-commerce data set, by running the SELECT * statement on the three tables:
1select
2    *
3from
4    {{raw.e_commerce_sample.webshop_customer}}
You can replace webshop_customer with webshop_order and webshop_order_line.
Remember to delete one query before you run another SELECT * statement.
When you have an understanding of which data you have available in your table, you can be a bit more specific about what you want to query.
Say you want to grab the highlighted columns in the customer table:
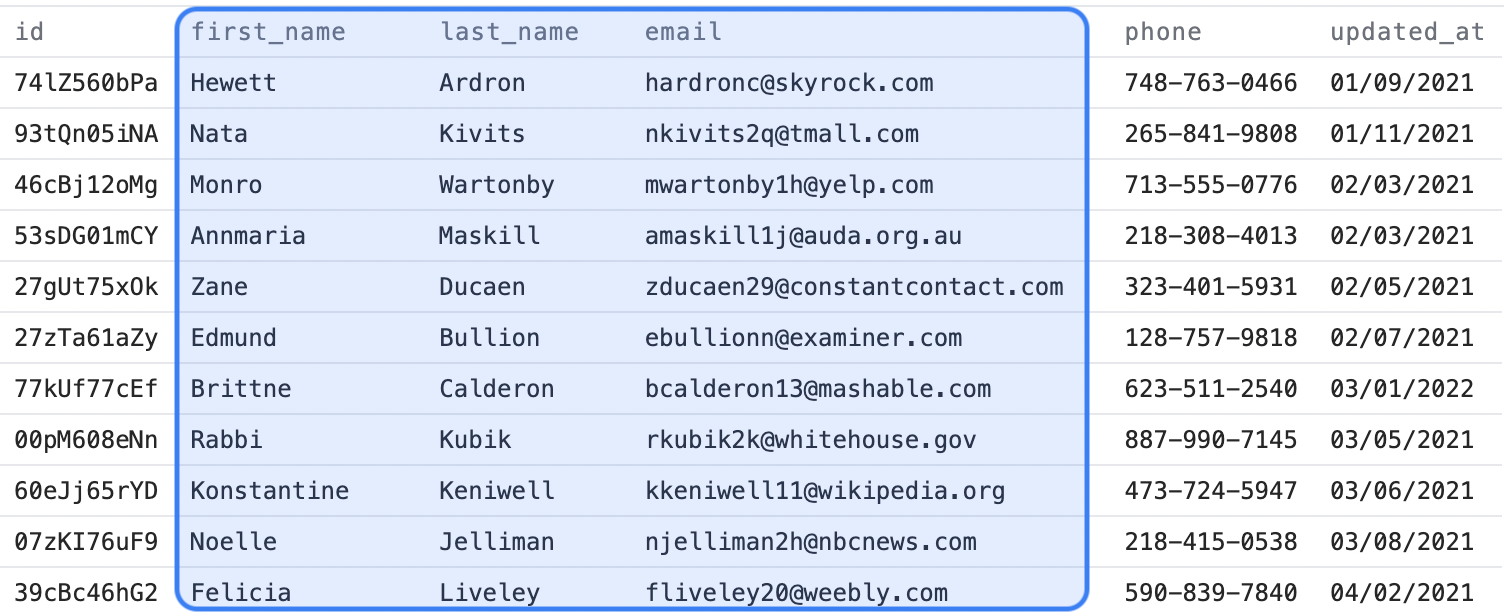
To get Weld to return these columns, you have to write out the column headers exactly as they are named in a query, like this:
1select
2    first_name
3  , last_name
4  , email
5from
6    {{raw.e_commerce_sample.webshop_customer}}
Now it’s your turn to try it out!
Try to write the query in Weld on your own and execute the query by clicking the Execute button.
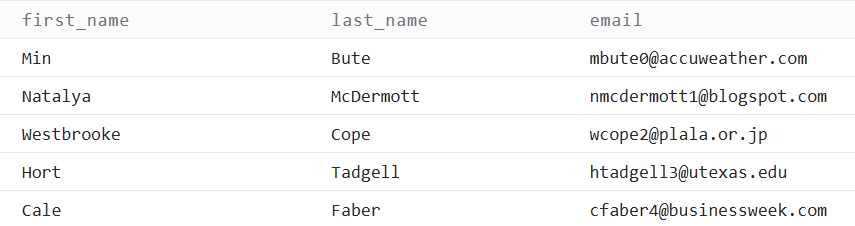
When you’ve done this, you should be seeing something like this:
Make sure the old query is removed before you add the new one.
Also, remember that you can only run one SELECT * statement at a time.
You’ll see the columns you’ve defined. Notice that the column headers are separated by commas in your query, and that there is not a comma after the last column header.
This is how you define exactly which and how many columns you want to be returned.
You can see all the available columns in your table in the Weld editor by going to the sidebar to the left and clicking the table you’re working on in the Data Sources panel.
If you click "insert all columns" in the editor, Weld will insert all the column headers.
If you click this, make sure the column names are located in the right place in your query, and execute it, you’ll see all the data in the table you’ve defined. Try this on your own.
The query should look like this:
1select
2    first_name
3  , last_name
4  , email
5from
6    {{raw.e_commerce_sample.webshop_customer}}
When writing SQL queries, the order of your code matters — but capital letters don’t.
This means you can use capitalization and spacing to make your queries easier to read, both for yourself and others.
Here are some simple tips:
- Use capital letters for SQL keywords (like
SELECT,FROM,WHERE) - Use lowercase for table and column names
- Add spaces and line breaks to separate parts of your query clearly — SQL ignores them, so it won’t affect the result
Pro Tip:
You can use the "FORMAT" button in Weld to clean up your query automatically. Or check out the Tips & Tricks section at the end of this guide for more formatting help.
Exercise 1: Use the SELECT function in Weld
In this exercise, you’ll use the SELECT function in Weld to retrieve the ID, customer_id, and shipping_address_country columns from the Orders table in the Weld_Sample_Data.
For this exercise, try to grab some data from the Orders table instead of the Customers table you worked with before.
The name of this table is webshop_order, and can be found in the same location as the Customers table.
So all you need to do is to change the last part of the from statement from webshop_customer to webshop_order, like this:
1from
2    {{raw.e_commerce_sample.webshop_order}}
Grab the ID, customer_id, and shipping_address_country columns from this table.
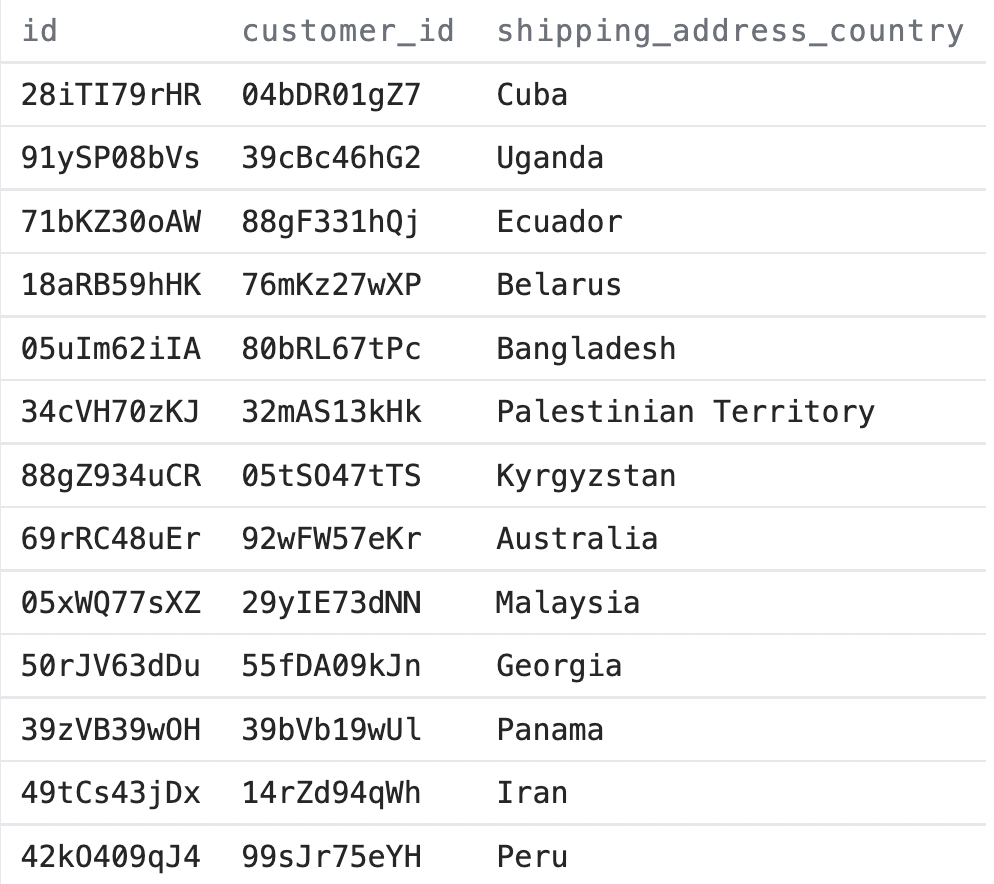
If you run your query, it should give a result like this:
In SQL there are often many means to an end, so you’ll usually be able to get the required result by writing different variations of the same query.
A simple way to solve the exercise above would be to write a query like this:
1select
2    id
3  , customer_id
4  , shipping_address_country
5from
6    {{raw.e_commerce_sample.webshop_order}}
Using * vs. Column Names for Performance
A little comment on how to make sure your queries also perform well if you start to work on larger data sets without taking too much unnecessary computing power.
From a performance perspective, writing out the column headers you need to use in your data analysis is more effective than using the * statement, even if you need all columns in a table.
It’s therefore recommended to write out the column headers (or have Weld do it automatically), and only use the * in your data exploration phase.
Next up
Introduction to filtering (WHERE)
The ‘where’ clause in SQL is a very simple way to filter out rows in your data set based on the content of it.
Go to lesson