.png&w=3840&q=75)
How to sync data from Stripe to Google BigQuery or Snowflake
In this step-by-step guide, we will show you how you can quickly sync your Stripe data to Google BigQuery or Snowflake using Weld.
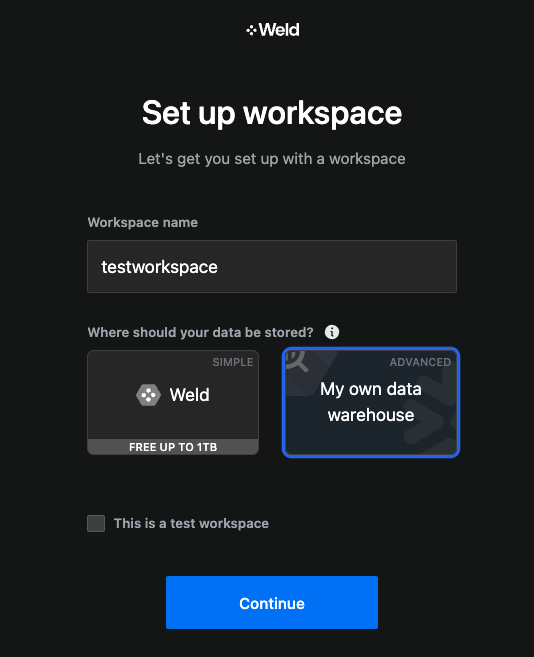
Step 1: Set up a new workspace in Weld
Click on this link to sign up for Weld if you do not already have an account.
On the signup page, you can either choose to connect to your own data warehouse or set up one through Weld to quickly get started.
Tip: You can migrate your data warehouse later to your own account.
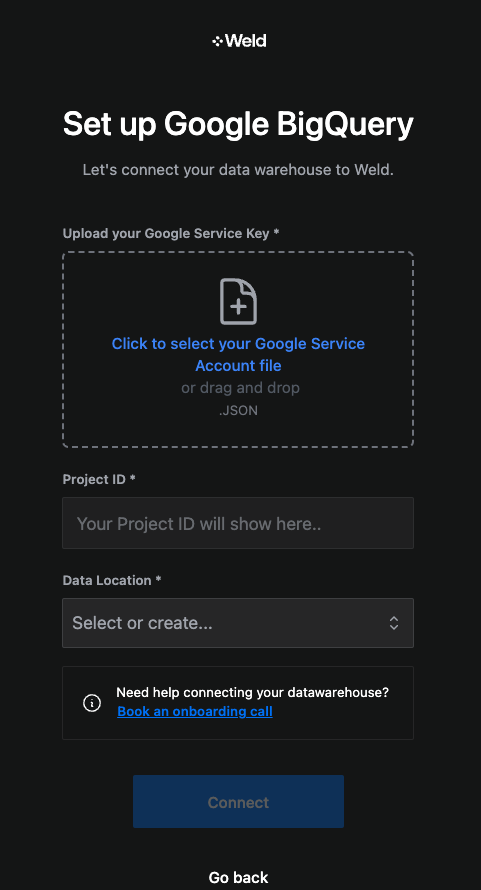
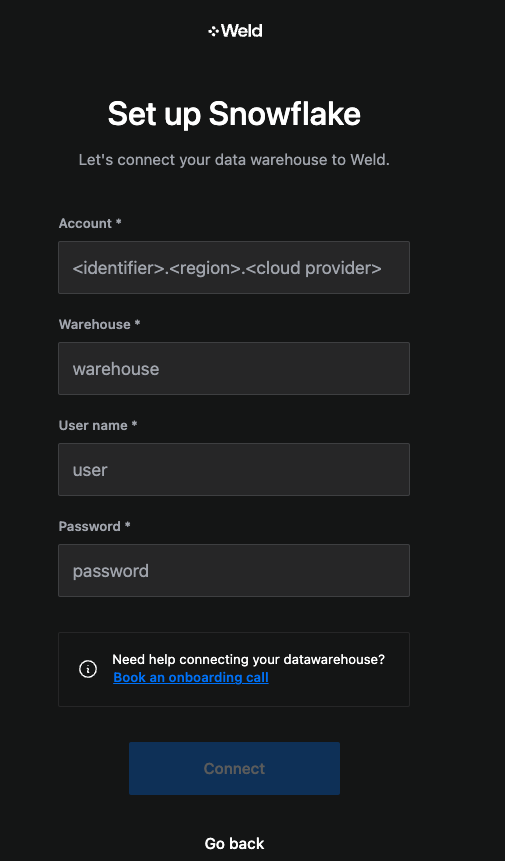
Step 2: Connect to your data warehouse
The next step is to connect to your data warehouse. (Skip this step if you chose Weld).
Follow the guide in the Weld app depending on your data warehouse. Continue reading the article about why your business needs a data warehouse.
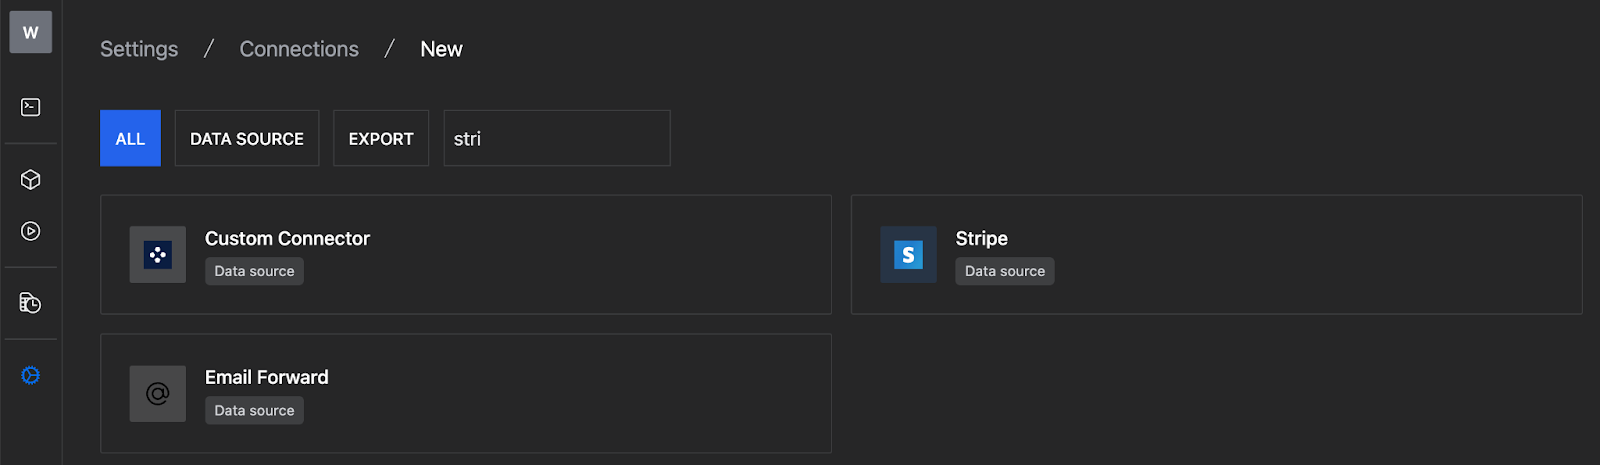
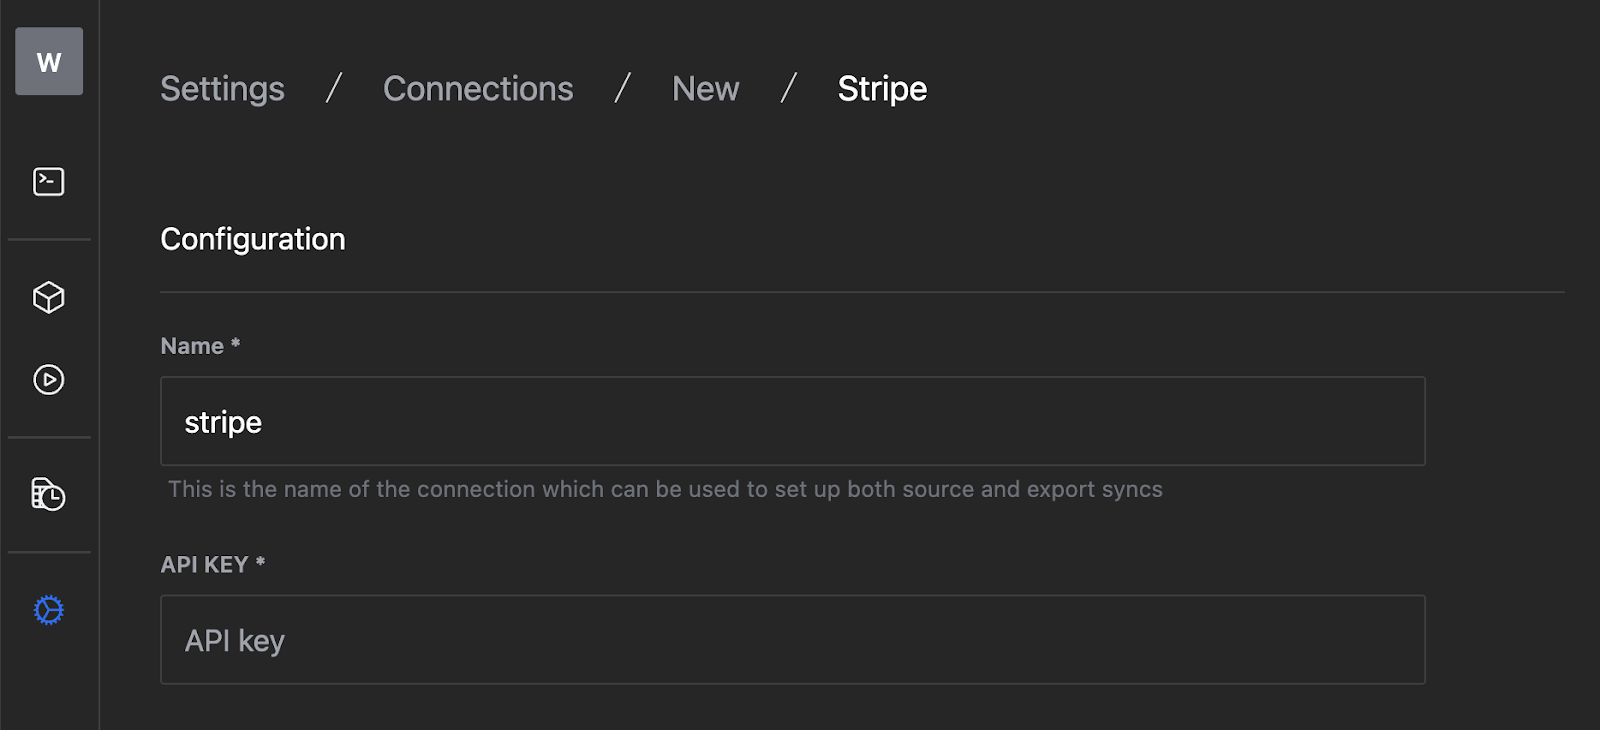
Step 3: Set up a Stripe connector
Now, let's set up a Stripe connector. Navigate to Workspace Settings and Click on ‘New Connector’.

Now navigate to find the Stripe connector.
Tip: You can search for the data sources you need at the top.
Name your connector and enter your Stripe account API key.
See this guide on how to create an API key for your Stripe account.
**Step 4: Set up your Sync under Data Sources **
Now you need to set up a sync in order to get data flowing into your data warehouse on a predefined schedule. Click on ‘Data Sources’ and Click ‘New’. Then find your connector based on the name you gave it.
Tip: You can search for your connector name in the select box.
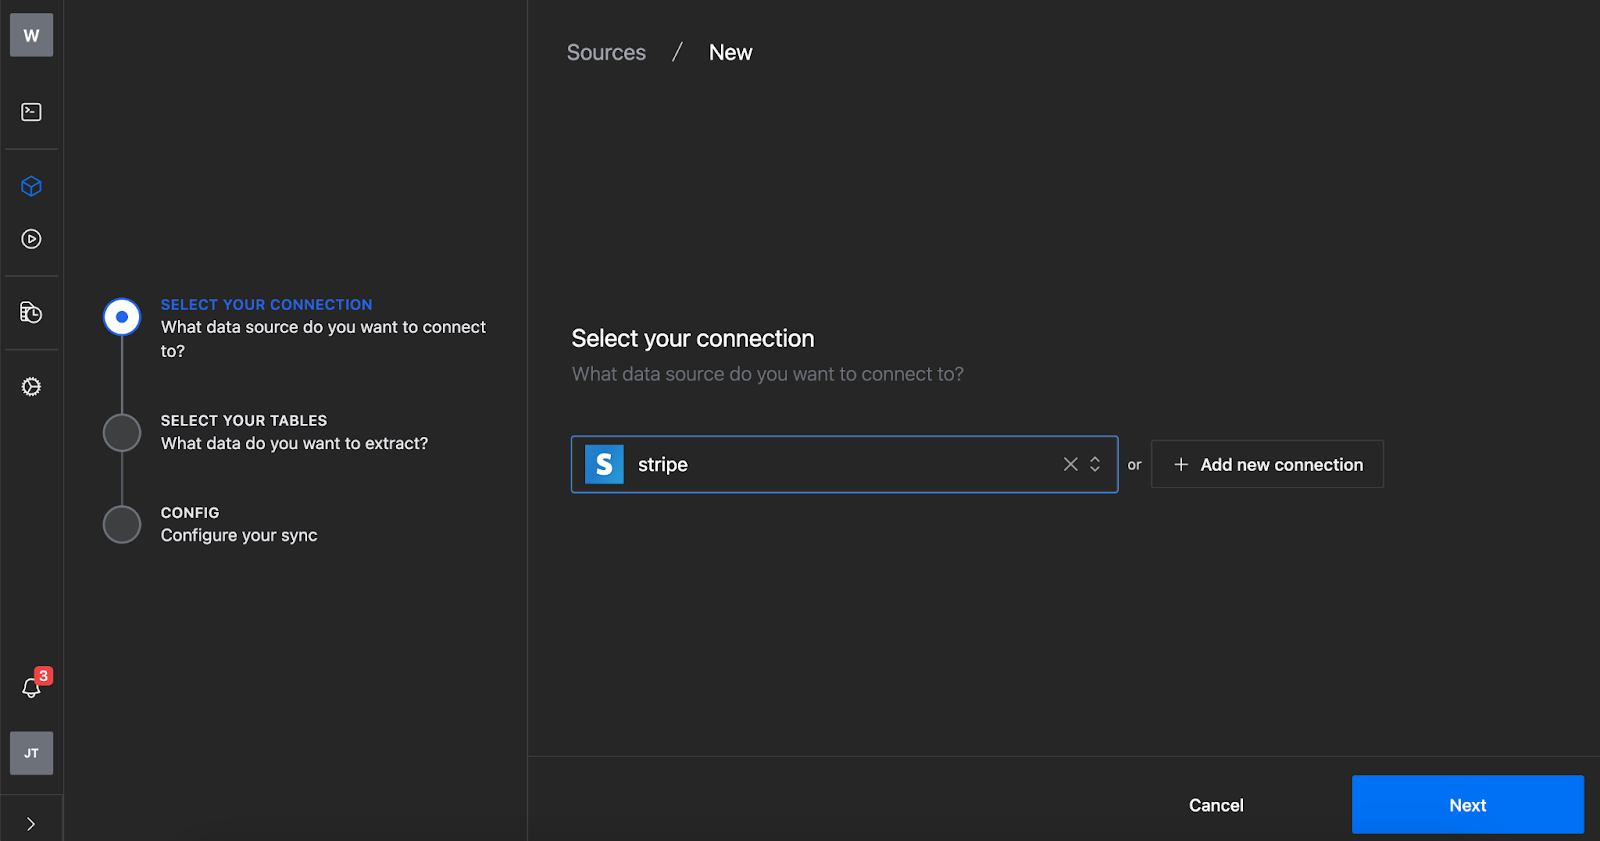
Next, select the tables that you want to include in your sync. You can quickly search the tables you need or select all tables.

Select only the tables and columns you need to avoid a lot of overhead which will increase cost both in your data warehouse and through Weld.
Tip: In case you are working with sensitive data you can hash specific columns.

**Step 5: Configure your schedule **
Finally, add a name for your destination schema and the relevant sync frequency (daily, hourly, or every 30 mins.) Then click ‘Create sync and you are done!
Tip: The destination schema defines where you tables will be located in your data warehouse

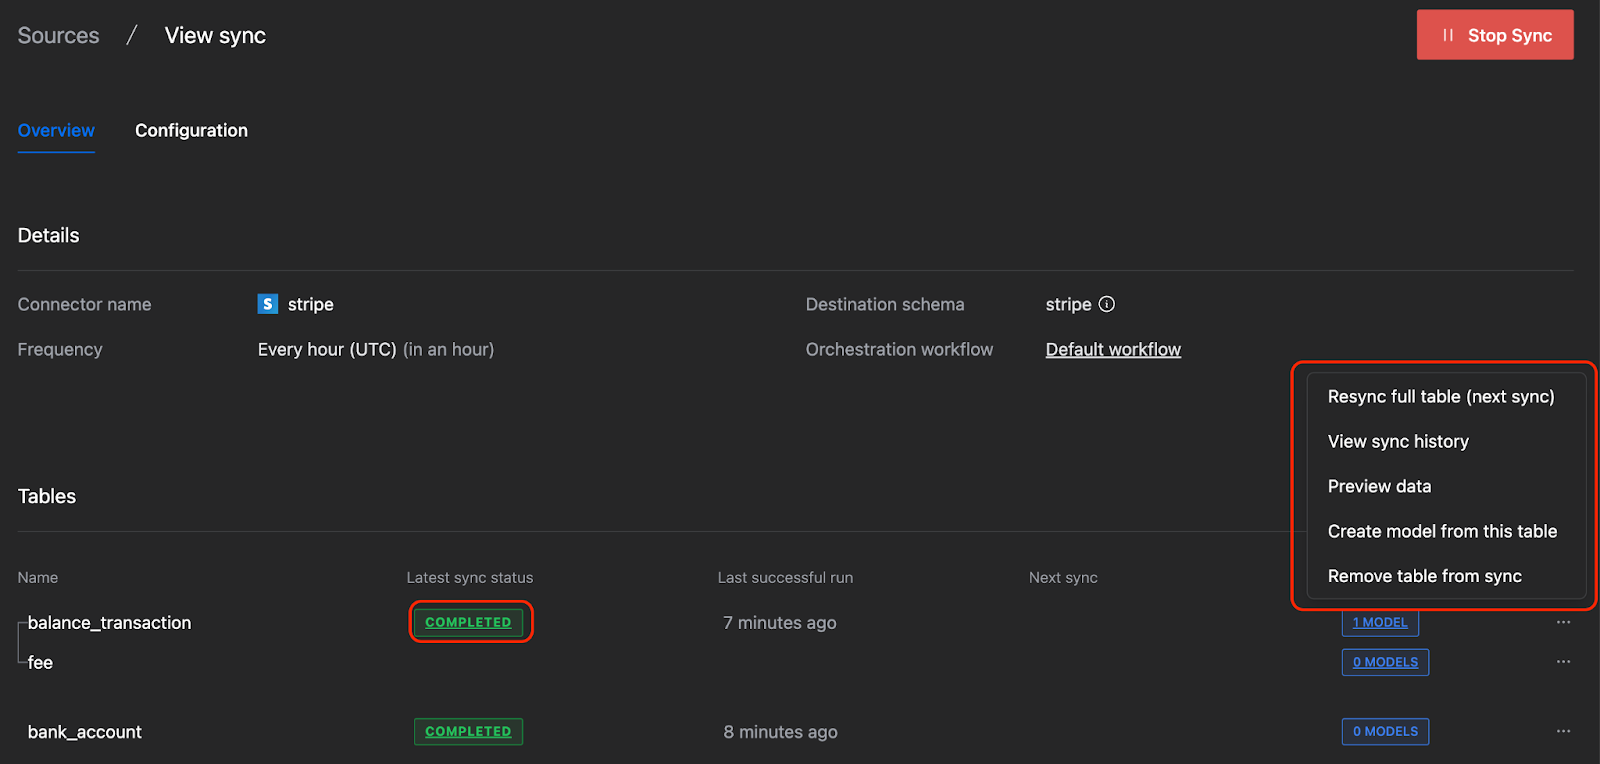
Step 6: Wait for the data sync to complete
Now, wait for your sync to complete. You can monitor the sync status in the column ‘Latest sync status’ for each table. Click on the status to get more details
You can always edit your sync later by navigating to ‘Data Sources’ and clicking on the relevant sync. Furthermore you can click on the right side on each table to resync the full table, view history, preview data, create a new model based on that table or remove the sync altogether.
Step 7: Start exploring data
You can now start exploring your data in the Weld Editor. On the left hand side you will see Stripe. It will be marked green as long as the syncs are running without any failures.
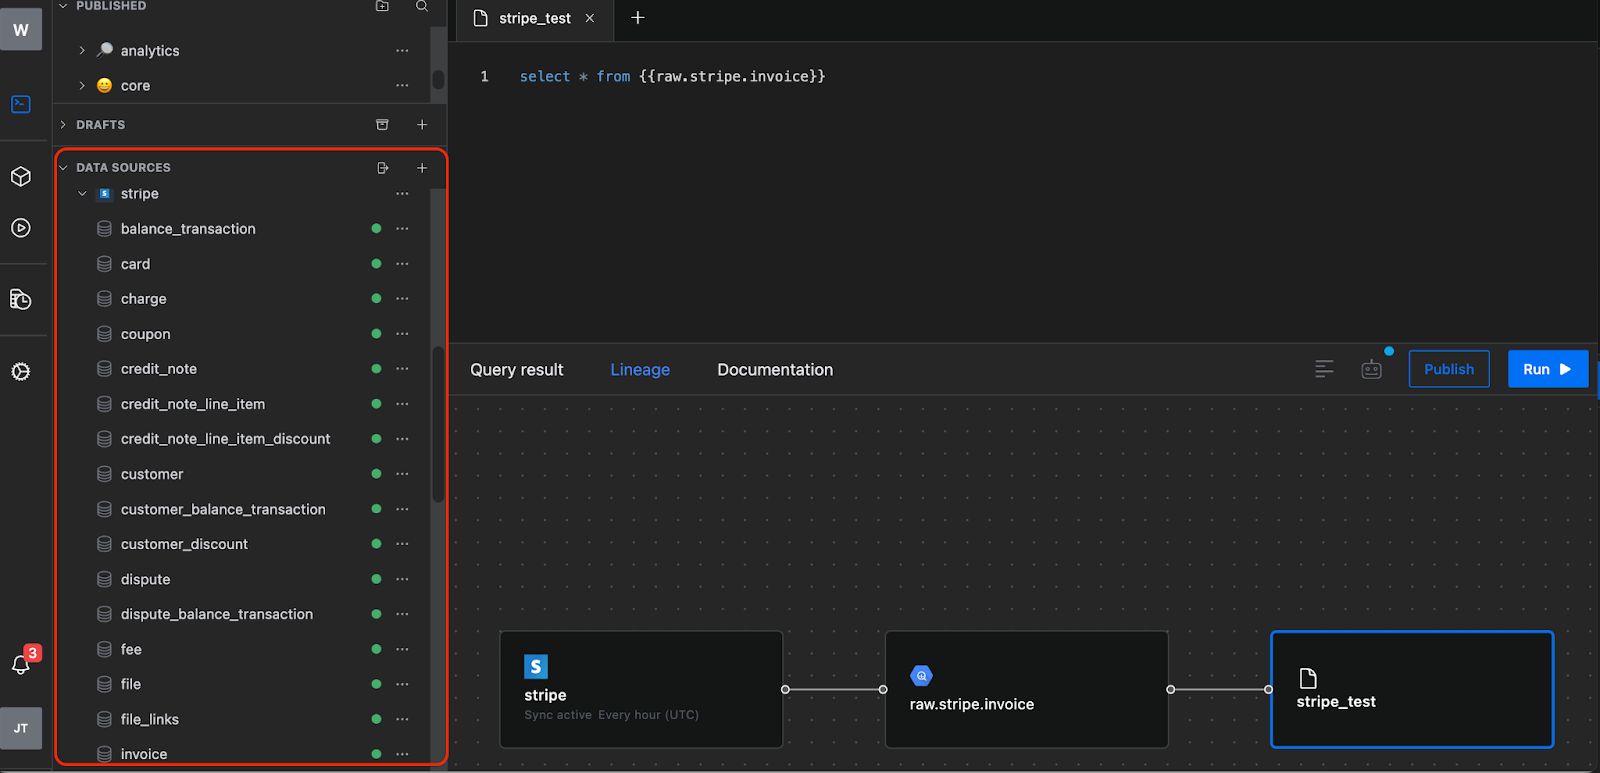
Thats it. You are now ready to create insights based on your Stripe data. Continue reading on our blog to learn more about how you can create metrics and dashboards using your Stripe data.