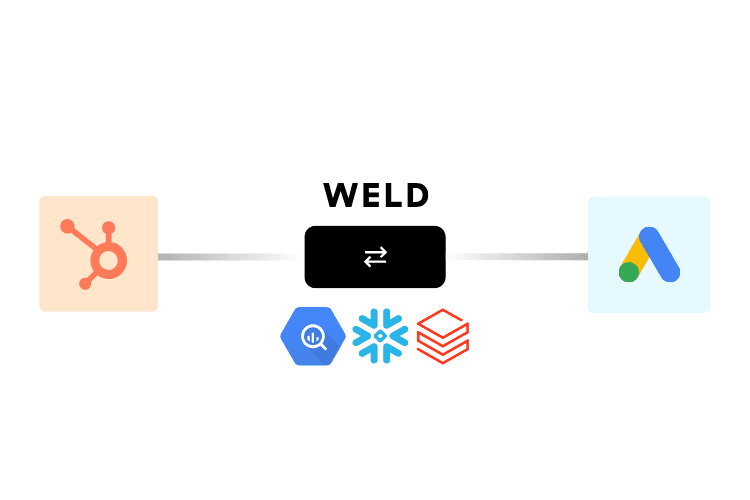
Reverse ETL Just Got an Upgrade
Activating your data shouldn’t feel like a separate product experience. That’s why we’ve updated how Reverse ETL works in Weld, making the setup process more intuitive and the sync overview easier to work with.
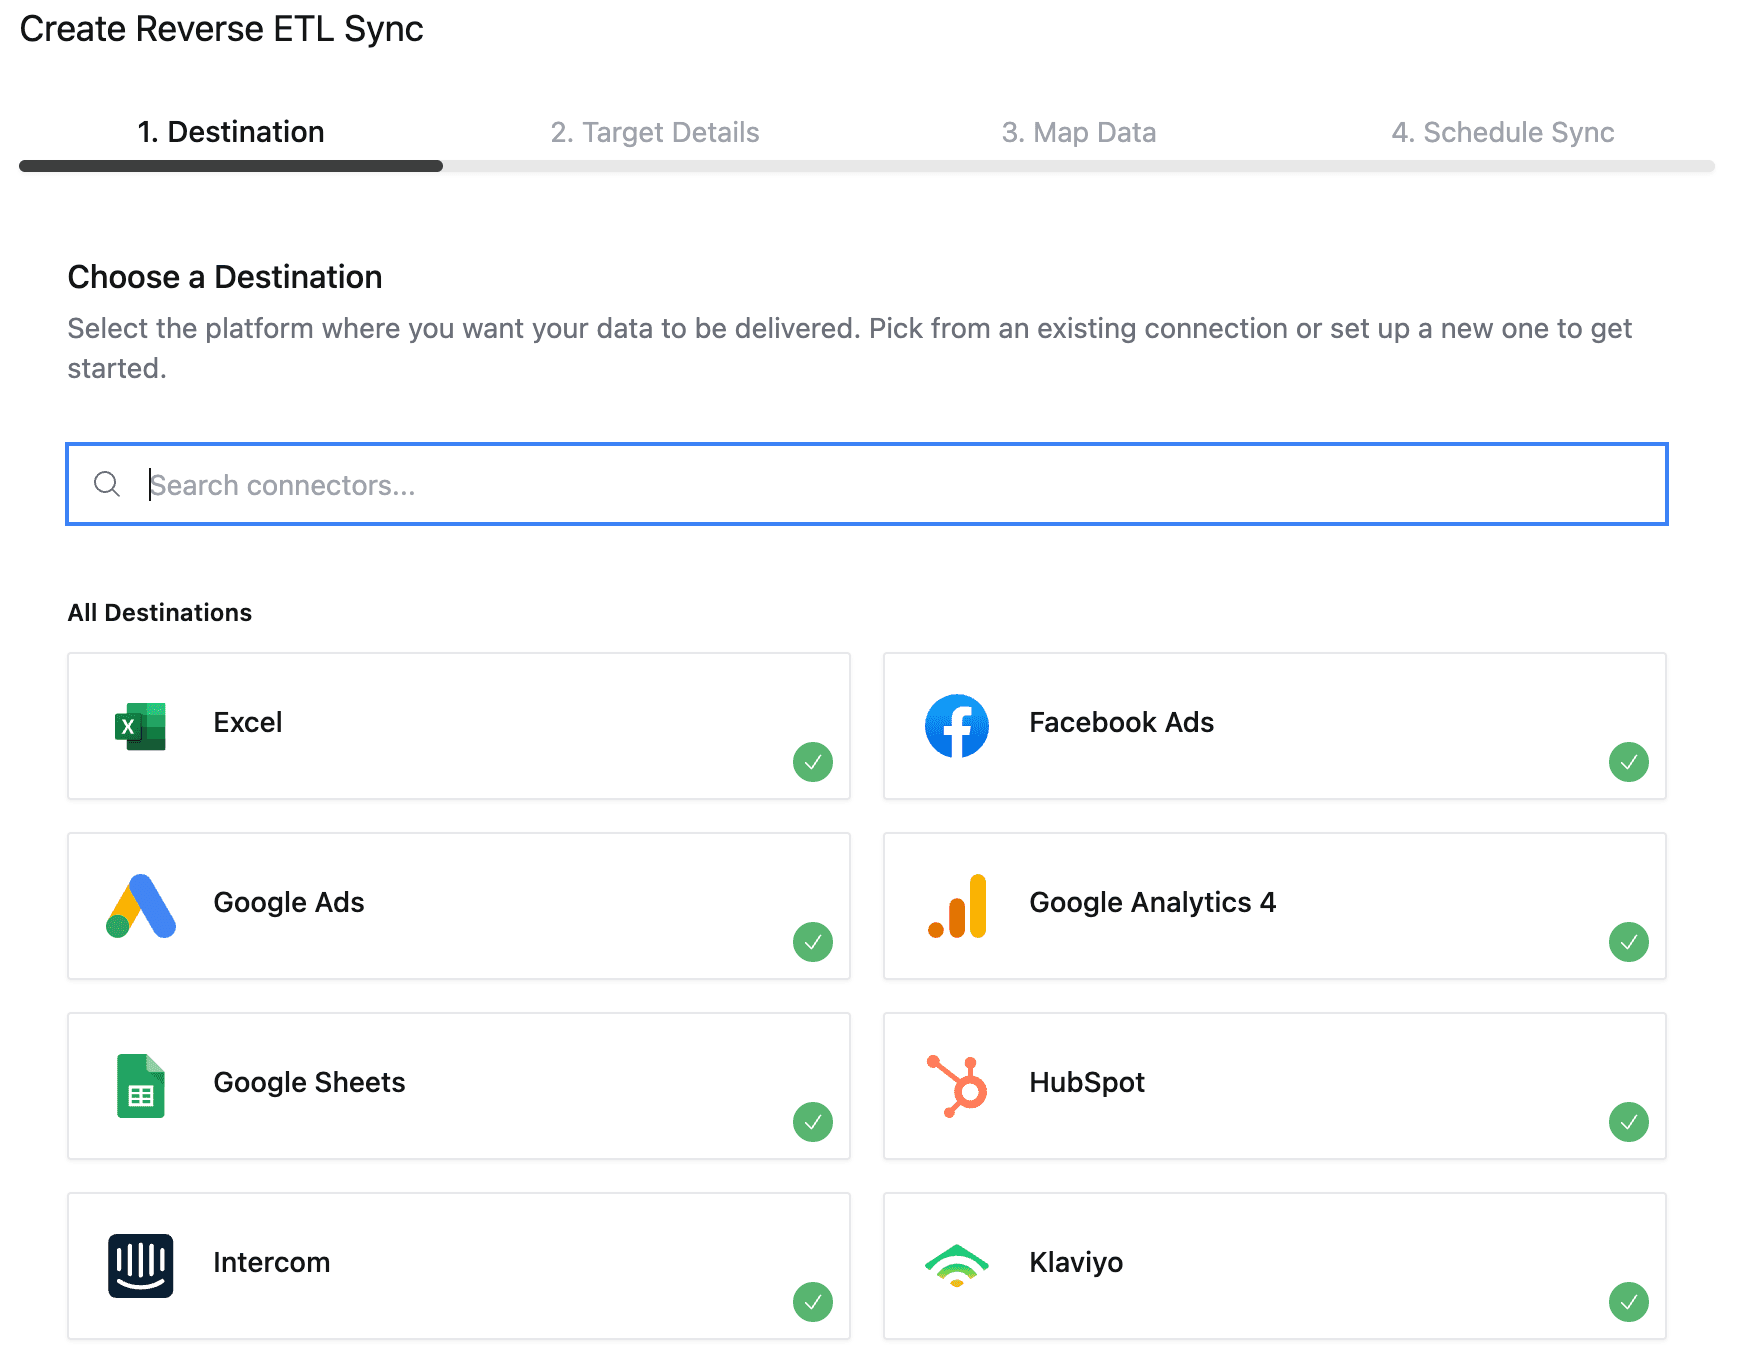
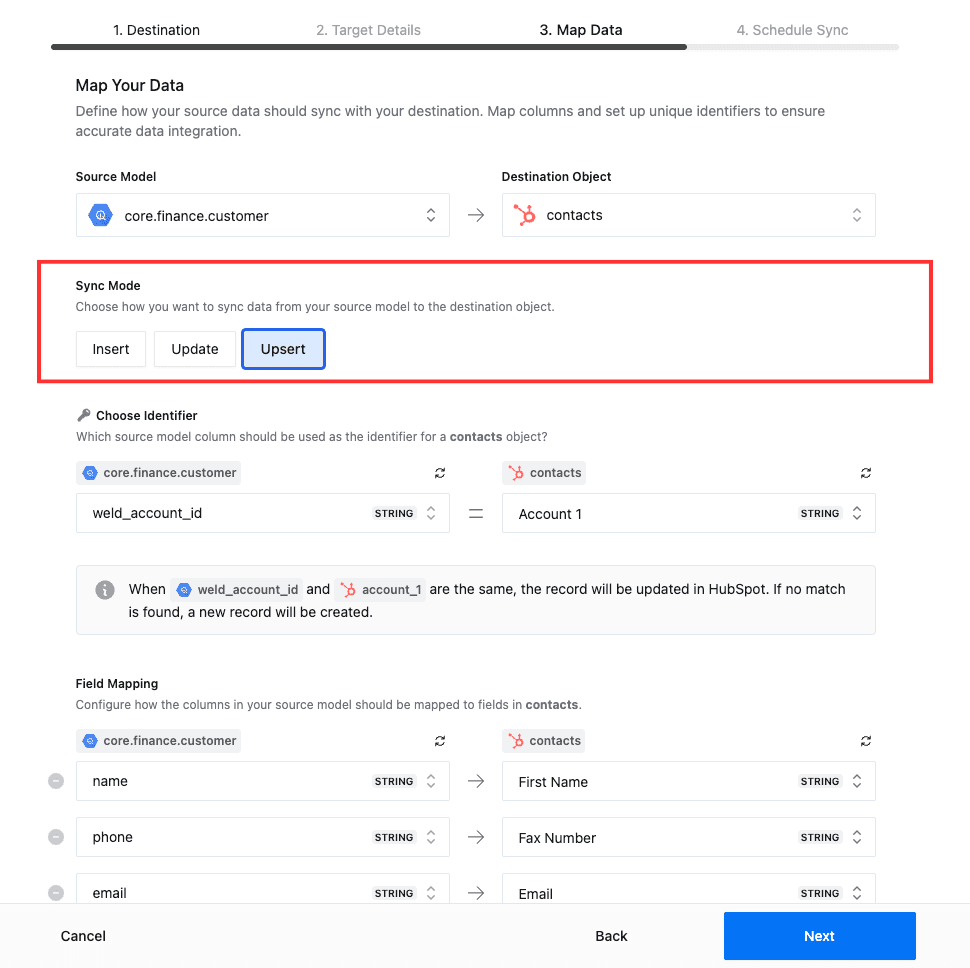
A more intuitive setup flow
The new setup flow is designed to match how you already work with data sources in Weld. Each step is structured to guide you through:
-
Selecting your destination (like HubSpot or Intercom)
-
Choosing the right object (e.g. contacts, companies)
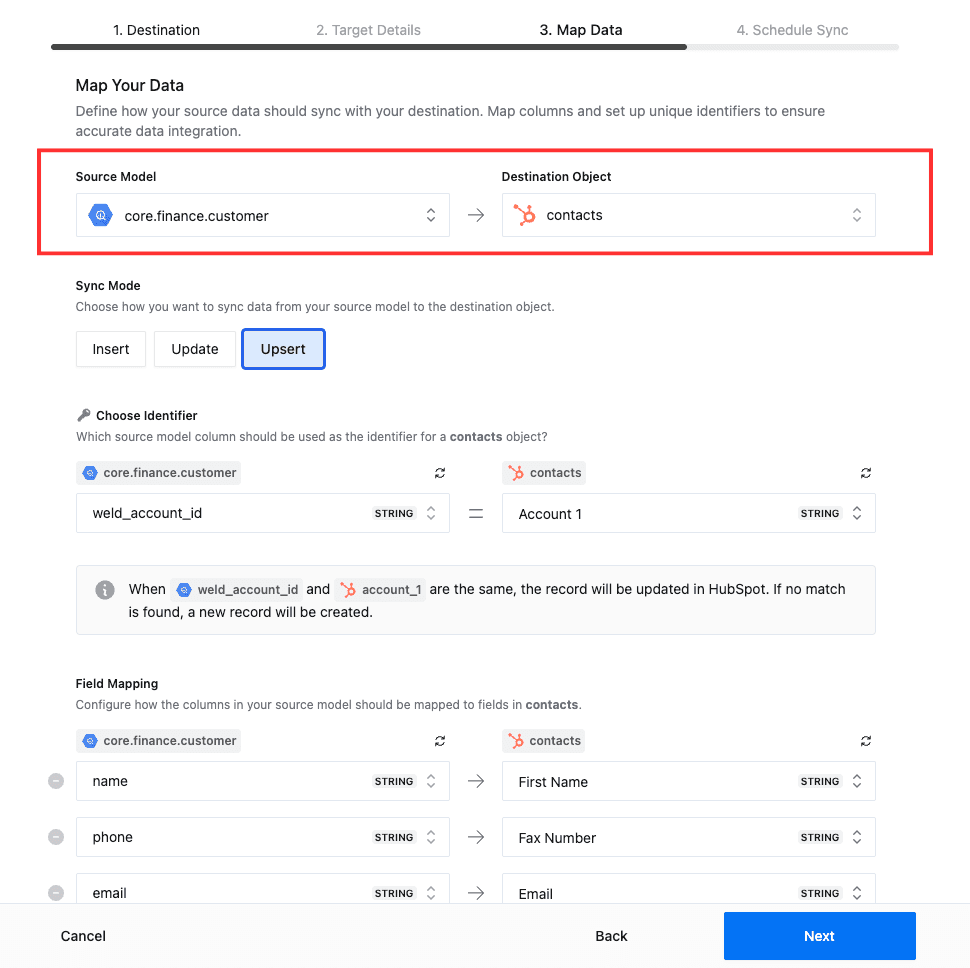
- Picking a sync mode: insert, update, or upsert
- Mapping identifiers and fields
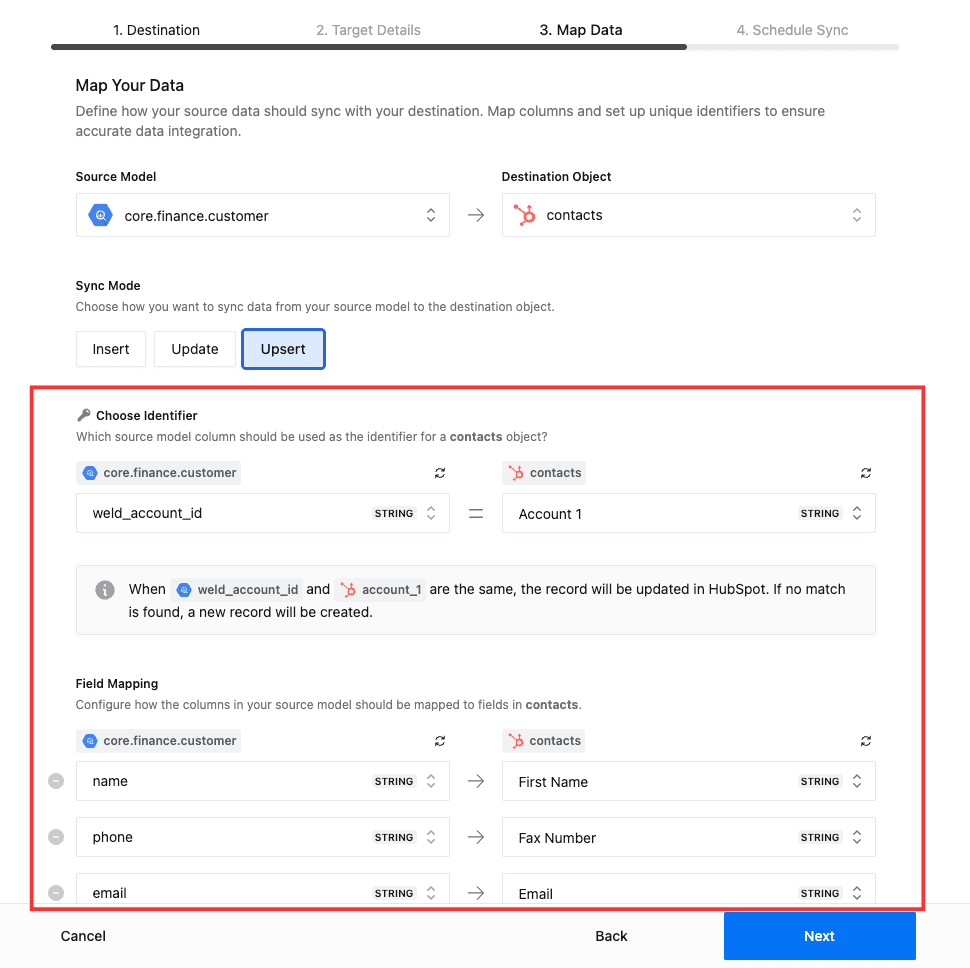
The goal is to reduce setup time — especially for first-time users — without limiting flexibility for more advanced workflows.
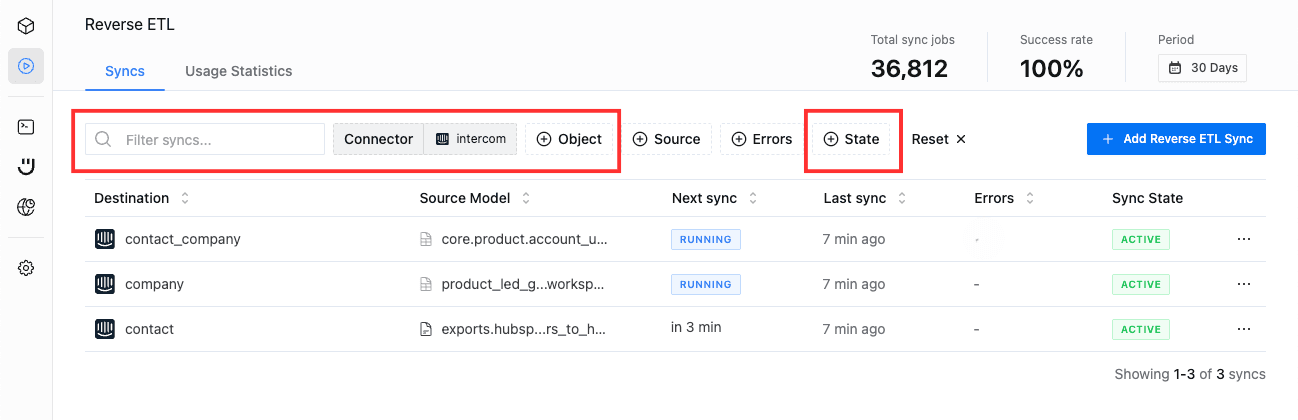
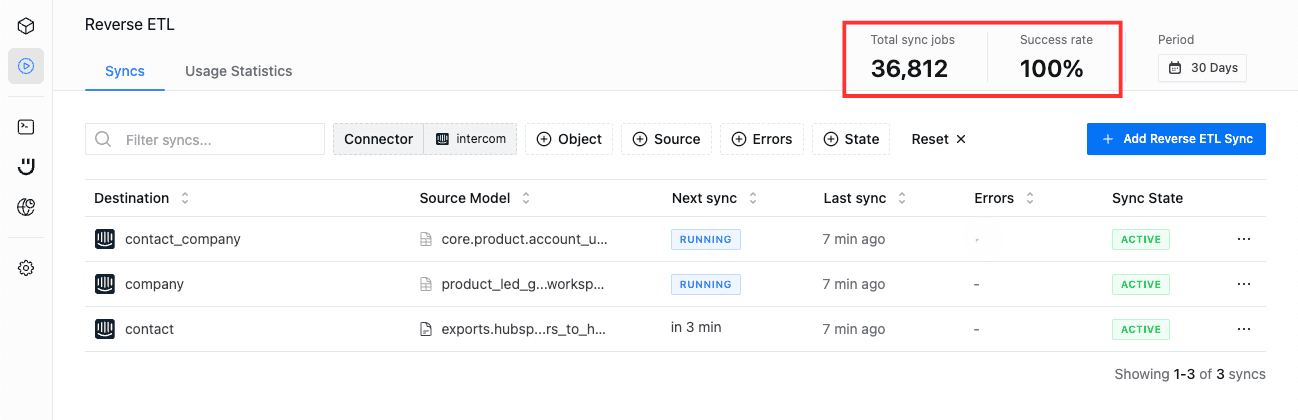
A clearer view of your syncs
Alongside the new flow, we’ve also refreshed the Reverse ETL sync list to give you better visibility. You can now:
-
Filter syncs by connector, object, or state
-
See the success rate and job count for each sync
-
Get immediate feedback on errors or sync delays
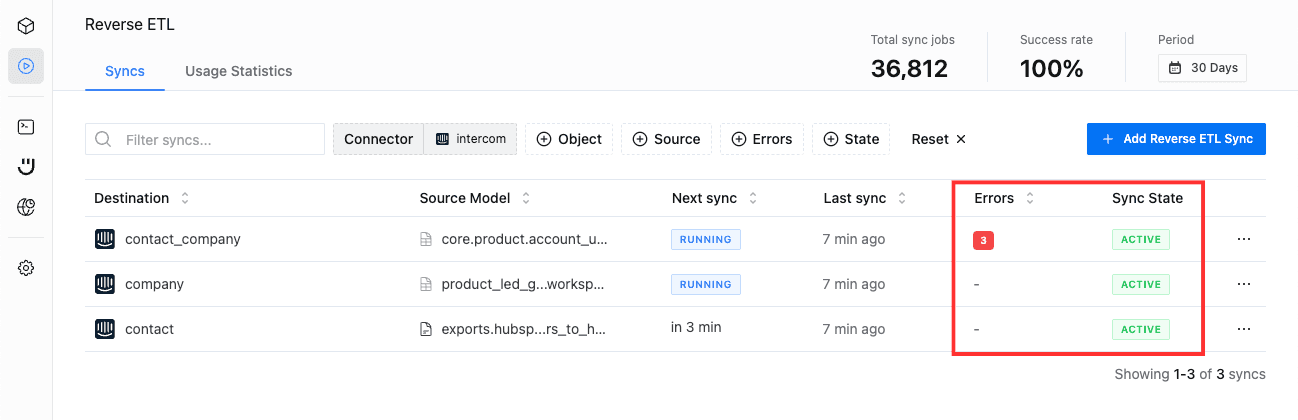
This makes it easier to monitor your live data workflows — and to quickly act when something needs attention.
Designed for teams that rely on activated data
Whether you're syncing revenue data into Salesforce or pushing enriched segments into your marketing tools, these improvements are about making the experience feel lighter and more reliable. Reverse ETL shouldn’t be a bottleneck — and now, it’s even easier to make it part of your everyday data stack.
You can explore the new setup flow in Weld today by adding a new Reverse ETL sync from your workspace.